
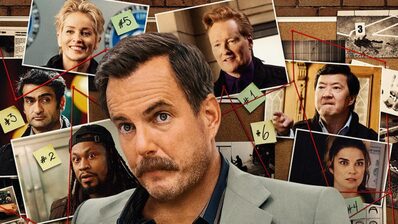
I don’t like how much Facebook appears to know about me. Somehow, they’ve discovered that I enjoy Martin Freeman’s work as an actor. To punish me for being a fan, they’ve been plastering my Facebook page with BritBox ads for a television series called The Responder. Starring Mr. Freeman.
I want to tell you, I’m not impressed by the show’s title. The Responder? He’s a responder, not even the first responder? Well, maybe it’s a British thing. Perhaps the show’s producers don’t want to make it sound like Martin is all full of himself. Or maybe the Brits feel that it’s enough that Martin responds to a crisis at all. “It’s nice of him to come by, don’t you think?” Inspector Corbyn asks his men. “Half a day late, half a week late, whatever works for Martin. He’s a jolly chap.”
Do people in England still call other people, “jolly chaps”? Did they ever? If you find out, don’t keep it to yourself. Let me know.
I first noticed Martin Freeman in the British version of The Office, an entertaining show with an adequate title. The Office title doesn’t sizzle, not like Jurassic Park. When I saw Jurassic Park on a theater marquee, I immediately parked my car, then stood in line to see the movie. The Office doesn’t intrigue potential viewers, either, not like Better Off Ted. On the other hand, I may be the only living person who loved that television show, so what does that say about entertainment today? If the Hollywood production factory can only squeeze 26 episodes out of a Better Off Ted, the name of the show isn’t all that critical.
There are two points I’d like to make before escaping the blog today. The first is, Facebook needs to run different ads on my FB page. Unless something more exciting comes along, I won’t be signing up for BritBox. Except for Martin Freeman and his accent, there’s nothing about this new show that makes me want to subscribe to another streamer service. If the program was called Jurassic Detective or Better Off Ted Returns, they’d get my money in a heartbeat. The second thing is that my Vella story, Sharp Teeth, comes out on June 1st. When I'm writing, I struggle with titles, too, but I like this one. The novelette’s subtitle is A Story of Lost Love and Werewolves. Unless I stumble along the way, there will be a new episode every three days until the tale is complete.
If you’d care to take a peek on or after 06/01, Amazon will let you read the first three episodes for free. There’s no Martin Freeman appearance in the first part of the story, but after…?
No, not even after. Martin might be a jolly chap, but he’s likely a jolly chap with lawyers. Lawyers aren’t jolly at all.


 RSS Feed
